Friday, 11 December 2009

SWOT Analysis

Strengths:

In this module I have found one of my most valued strengths to be creativity and patience. This work is very time consuming and requires a great deal of effort to get the desired results. I also like to credit my ability to pick up and learn new skills which have helped me tremendously in terms of Modelling, Texturing and Lighting effects.

Weaknesses:

I feel my weaknesses in this area of work has been underestimating the development time needed for the models. I am pleased with the results I have but I feel that improvements can be made to some areas of my work especially texturing. The texturing for me has been the most challenging and time-consuming aspect of this work and without invaluable guidance would certainly have not been able to produce this quality of work.

Opportunites:

This module has given me the opportunity to experiment with many different pieces of 3ds max including lighting, rendering texturing, Cameras and modelling. At the start of the module, I bought a 3ds max book on the theme of modelling game elements but found some areas of this extremely challenging and ended up stopping. Now however, I can safely say I have practised and learnt enough from the module to go back to this book and complete each chapter comfortably.

I have also learnt to master a technique using planes to model objects from scratch through personal learning. This was a major part for my swordfish render which would have been possibly more difficult to produce otherwise. Finally, I have also experimented using the hair and fur modifier by following tutorials on the web which I fell will definetly help me in any future pieces of work I undertake.

Threats:

I fell my biggest threat this is area of work has to be time management. I will in future be planning work with a schedule to allow myself enough time to properly work on difficult stages of development and allow changes to be made in good time that will not effect the final result.

Final Stamp design!

And now for the Pièce de résistance... My 'Golden' Eagle Stamp:


I used simple image for the background for this stamp. The eagle itself consists of a few duplicated layers each using a different blending mode (linear light, multiply etc.) with a small Gaursson Blur and artistic brush for added effect.

I am very proud of this piece of work!

Completed Eagle Model

After a long period of time texturing the model I finally came up with this:


Eagle texturing

I've finally finished what i've found to be the most time-consuming piece of this module so far!

My Eagle render currently has over 4000 individual feathers so you can imagine how much time this took to create not to mention render by 2800 x 1900!

I started off trying to unwrap the different parts of the eagle and texturing that way, however after attempting only the body of the eagle, I found this was not the effect I was hoping for and scrapped this idea:


This experiment encouraged the idea of texturing the Eagle using individual planes with a feather image similar to the way I have done my Wings.
Now came the hard part, the feathers need to be 'wrapped' around the eagle to get the feathery effect I have been looking for. The angles of the shape were very challenging in some areas to get right and give the illusion of being covered in feathers.


I then added an omni Light to the scene to pick out the front feather and give the behind ones a shadowy efect. The light also helped illumniate certain areas of the model which made the feathering slightly easy to do.

I started by added feathers to the face and working my way around the eagle's head..

Wednesday, 9 December 2009

Stamp 2 Complete - Cobra

After experimenting with different backgrounds, lighting effects and images I came up with this:


The biggest issue i had with my 2nd render was trying to find a scene / background that suited a snake. A grassy field didnt seem right for a Cobra so i tried a more 'human' approach and thought about how some people interact with snakes by keeping them in baskets in some countries.

This is my result.

Cobra Snake part 2.

With the modelling finished I could now focus on texturing my Snake. I searched online for a suitable snake scale texture and was able to find this:


I felt this was a really nice pattern with a high level of detail that would be perfect for my snake. Cobras however, are usuallly a shade darker than the tone in the texture image so I needed to modify the brightness and contrast slightly in photoshop to get the desired effect.

I started off using the same method as my previous model and unwrapping the animal. I was alot more comfortable texturing this model due to its simplicity in terms of size and shapes which saved me a good deal of time when it came to creating the texture map. One important part of this texture was the scale, and getting it just right to suit the size of the shapes and being careful not to lose too much of the detail.


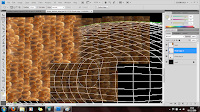
Feeling comfortable with the method in which I textured my swordfish I created a black and white shape layout alongside the texture map to ensure I could spot any error when the texture is wrapped around the model:


As the image clearly shows, areas in white have been textured whereas the remaining black sections need to be. I am unsure as to why the texture doesnt actually show in 3ds max until the model is rendered, however this benefitted me more as the texture map errors were much easier to spot! (black and white)


Once the texture mapping was complete I went around the shapes and carefully studied the rendering results to home in on the texture wrap errors. This was quite tricky and I did have to go back and redo some areas a few times after noticing small sections now and again while rendering. Fortunetly I managed to get a good result.


Next I created a very simple eye in photosop and wrapped this image around two spheres and carefully positioned them in the snake's head:


Last but not least was creating a scene for my cobra. I experimented making some pots that I felt the snake could lay in front off with a grassy effect around it:


To create the displaced terrain, I followed a short tutorial which can be found here: http://www.youtube.com/watch?v=eoq6-JLcmds


I wasn't particulary impressed with the result and felt that a different approach may be needed for my stamp design.

Swordfish Stamp - Complete

Here is the Final design for my first stamp..


this stamp was creating using a pre-made template for the layout (border), however the background was created myself by following a tutorial I found online which can be found here: http://www.rnel.net/tutorial/Photoshop/12484

I then imported my render into the image and applied a Multiply effect to blend the swordfish into the background. I also reduced the Opacity to around 65% and added an 'inner glow' and 'bevel' as a final effect.

Monday, 7 December 2009

Cobra Snake part 1.

Due to the complexity of the spider model, i have decided to drop this and model a simplier animal as my 3rd render.

Following my theme ("predators, speed and ambush"), I have chosen to model a Cobra snake. I feel this animal will prove to be somewhat easier to create and texture compared to the complex spider model I have been attempting.

I started off with a simple snake anatomy picture and crafted a basic plane to cover the layout of my snake and converted it to an editable poly:


I then expanded the vertices to create the 3d body and head for my snake. Following this I added a symmetry modifer to create the underside of my snake:


Once this was done, i started to look at different poses that my snake might have and chose an upright position. I also flattened and stretched the cobra's neck to give my model it's trademark snake pose:


Alongside this I crafted eye sockets as seperate planes and simply attached them to the snake's head. this was quite tricky to get the scale and position right as well as making sure not too many edges and vertices were left behind after attaching it:


So far so good. I am very pleased with the result at the present time.

Sunday, 6 December 2009

Swordfish Texturing part 2.


To apply my texture the render, I used the same method featured in the leaf tutorial in which a black and white image outline is created to hide the texture's background when rendering the model. This allowed me to view what areas of the texture map needed work and and gaps filled in.


I ran into several problems with the original texture map. The stripes were extremely pixelated upon rendering the model and some areas of the texture map were leaving unsightly cracks and creases on the model. I scrapped the stripes and decided to try a very simple texture map and tested it:


I was quite pleased with the result as it produced a much tidier render than the previous texture map. I explanded on this and made sure no gaps or any other visual errors could be seen.

The next step was to start texturing the swordfish's fins and tail. I started by opening the swordfish model and deleted the body, leaving the fins and tail behind.


I unwrapped the model and saved the mesh, this allowed me to carefully paint each section of the swordfish's fins and tail.


Again I used the same method of creating a black and white outline of the sections, allowing me to see which parts needed extra work. Once this was complete, I exported the fins and tail as a seperate Object file and imported it into the file containing the sword fish body (fortunetly the body and fins were aligned correctly so minimal corrections were needed here).


Now the body is complete with all fins and the tail I added a simple eye by drawing a sphere and adding an eyeball texture made in photoshop. The end result can be see here:

Friday, 4 December 2009

Swordfish Texturing

Now my swordfish model is complete - i can start to apply a texture to my render.

I started off by 'Unwrapping' my model using the Unwrap modifier, however due to the shape of this particular animal the fins and tail made the unwrap result very difficult to work with. To work around this the fins and tail were removed and just the fish body was unwrapped. This allowed me to start texturing more easily by doing the fins seperately.


The next stage was to flatten the unwrapped image and save this as a file so the texture can be crafted using Photoshop:


I then imported the original swordfish image i have been working from to recreate the texture over the UVW wrapping mesh. To start, I selected the top half of the fish body and pasted on a new layer to the UVW mesh image, set the Opacity to 75% and began to shape the texture to cover the boundaries.

Monday, 30 November 2009

Eagle Coming Together!

With the head completed, I could now focus on crafting a suitable body to attach this to as well as the eagle's legs.

I used a very basic side view of a bird to create the body using planes and adding a simple symmtery to get the completed 3d render. This was then attached to my eagle's head after adjusting the scale to best suit the head's dimensions.


The final part of this section was to create a pair of legs for my eagle. This again was created using a sideview scientific image of a chicken's leg and using planes to model it. I edited the claws slightly due to fact that an eagle's talons are much larger and more significant to an aerial Hunter.


Once this was completed, I imported the render as an object and simply scaled and attached the leg to the body. I had to mirror the leg using the symmetry modifier to create a right and left leg.